Guide to Maintenance of Medical Monitoring Devices
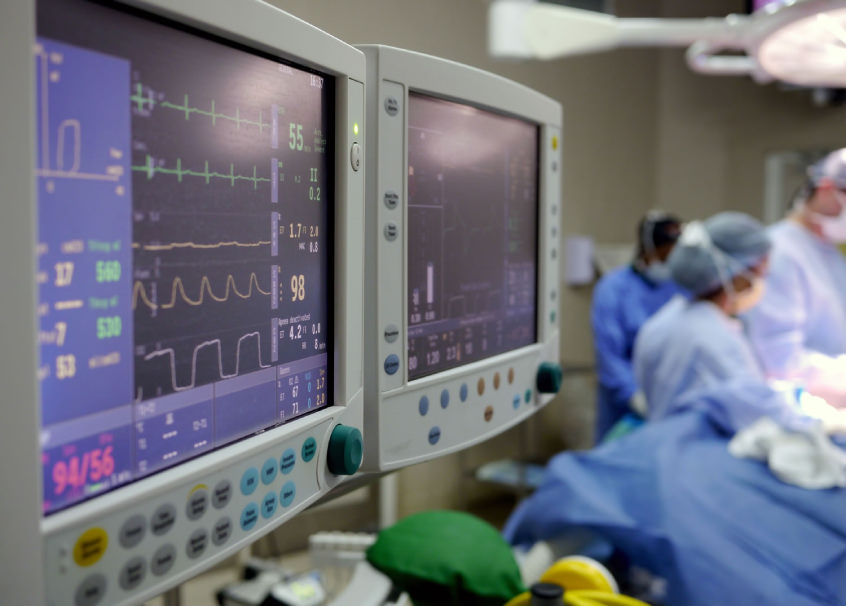
Patient monitors provide real-time monitoring of patient vital signs and often include warning systems when values deviate from set parameters, indicating a patient has taken a turn for the worse. A patient monitor can track the heart rhythm with an electrocardiogram (ECG), respiration, blood oxygen level (SpO2), non-invasive blood pressure (NIBP), and temperature.
To power the patient monitor, electricity entering the machine will pass through first the power supply module or charging module of the system. Sometimes a voltage regulator is installed for the safety of the machine. From this, the power supply module will go through the backup battery if present. Most medical devices do have a backup battery for emergency use, but it is not uniformly presentand instead use UPS. From there, the batteries will distribute the power on the main board. The main board will be responsible for the distribution of the electricity to the other boards including the sensors as well as the actuators. Through the simultaneous function of each component, a medical device works and generates medical data for every patient.
The following are some general guidelines on maintaining these devices.
Electronic Maintenance on Patient Monitors
The electronic PCBA and components don’t require frequent maintenance. Typically semi-annual inspection and annual calibration is prudent to ensure the accuracy and reliability of data generated by the medical devices. Peripherals and the sensor however must be regularly checked to ensure that the device is working normally.
Step 1: Prepare the Patient monitor for the scheduled maintenance. Make sure that all of its accessories or peripherals are present such as the SPO2 sensor, temperature sensor, BP cuff, ECG cable, and CO2 sensor.
Step 2: Disconnect the peripherals to the machine.
Step 3: Dismantle the cover of the patient monitor to access the circuit board inside the machine.
Step 4: Check voltages on the test points to check whether the values are within the normal range. Reference voltages are listed on the service manuals of each patient monitor, depending on their brands.
Step 5: Turn off and unplug equipment from the main power source. Use an aerosol duster to clean each of the circuit boards and connectors to eliminate dust or dirt particles inside the machine. If some of the dirt is still present and cannot be removed by the duster, dry swabs or swabs saturated with a solvent such as isopropyl alcohol (IPA) can be used to clean the remaining dirt. (Note: Swabs are one-time use, so dispose after usage.)
Step 6: Re-install the connectors and replace the cover of the machine.
Step 7: Clean the peripheral ports using an aerosol contact cleaner. An extension tube can be used to penetrate tight areas. Spray the cleaner on the ports of the SPO2 sensor, CO2 sensor, BP app port, and ECG cable.
Step 8: Clean the ECG connectors, SPO2 sensor connector, CO2 sensor connector, AC power port, LAN port, and temperature connector using an aerosol contact cleaner. For the main sensors of ECG cable, SPO2 sensor, temperature sensor, and CO2 sensor use presaturated alcohol wipes to eliminate dirt or oil.
Step 9: Use alcohol wipes to clean the LCD screen, buttons, and knobs of the monitor. (Note: Wipes are single-use. Do not reuse.)
Step 10: Power up the machine to check whether the machine is working normally. Check all the sensors if they are all working.
Electronic Maintenance on Pulse Oximeters
Pulse oximeters are used to monitor a patient’s pulse rate, heart rate, and oxygen level. This device is simple to maintain but requires frequent cleaning. Pulse oximeters have a light source and photodetector, and any interference will cause an incorrect output. These two components require frequent cleaning to ensure that the data generated by the machine is accurate.
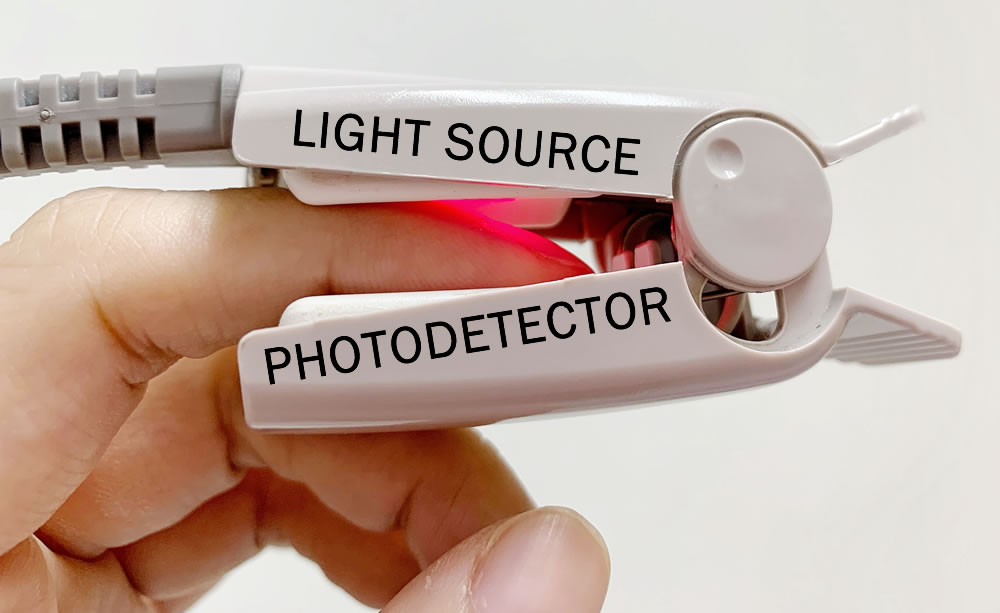
Figure 1.1. The light source will emit light to the finger and the detector will receive a certain amount of light energy and convert it into pulse oximeter data. This is why cleaning the detector and light source is necessary. A small blockage might result in incorrect data.
Step 1: Prepare the Pulse oximeter.
Step 2: Use alcohol wipes to clean the outside appearance of the pulse oximeter.
Step 3: Clean the detector and the light source using pre-saturated alcohol swabs and wipes. Inspect and make sure that there will be no light-interfering material on either surface. (Note: Wipes and swabs are single-use. Do not reuse.)

Electronic Maintenance on Fetal Monitors or Fetal Dopplers
Fetal monitors are used for monitoring fetal heart rate, fetal movement, and contraction of the mother’s uterus before and during labor. Just like patient monitors, fetal monitors or dopplers require maintenance before and right after usage.
Step 1: Prepare the Fetal monitor and the probes (TOCO probe, FM Probe, and FHR probe).
Step 2: Dismantle the battery and check its condition.
Step 3: Clean the connector of the battery, as well as the port, using an aerosol contact cleaner.
Step 4: Clean the port and the connector of the TOCO probe, FHR probe, and FM Probe using an aerosol contact cleaner. The extension straw can be used to spray into tight areas. For the surface, you can use pre-saturated alcohol wipes to remove gel residue on the surface of the probes. (Note: Wipes are one-time use, so dispose of them right after usage.)
Step 5: Reinstall the probes and power up the machine. Check whether all probes are working normally.
Monitoring medical devices are real-time readers of patients’ vitals within parameters. The data generated by the machines will be the basis of the doctor’s knowledge and treatment protocol. To achieve the target accuracy and reliability, proper maintenance is necessary.
For more information on swabs, wipes, cleaning solvents, and other necessary supplies for medical device maintenance, contact a Chemtronics technical specialist at [email protected] or 678-928-6162.
Ask A Technical Question
Stay up-to-date on Chemtronics news, products, videos & more.
