Soder-Wick Lead-Free Desoldering Wick

Soder-Wick Lead-Free desoldering wick is the state of the art in desoldering technology. It is specially designed for removal of today’s high-temperature lead-free solders. The single layer weave used for Soder-Wick Lead-Free desoldering wick is lighter in mass than any other desoldering wick available and allows for lead-free solder removal at lower temperatures. Soder-Wick Lead-Free desoldering wick responds faster than any other conventional desoldering braid. This unique design minimizes overheating and requires less “contact” time thus preventing heat damage to the PCB and sensitive components. For Lead-Free rework, Soder-Wick has the answer.

Soder-Wick brand desoldering wick offers the state of the art in desoldering technology. Soder-Wick is designed for today’s heat sensitive electronic components using lighter mass, pure copper braid construction that allows for better thermal conductivity, even at low temperatures. Soder-Wick responds faster than conventional desoldering braids thereby minimizing overheating and preventing PCB damage.

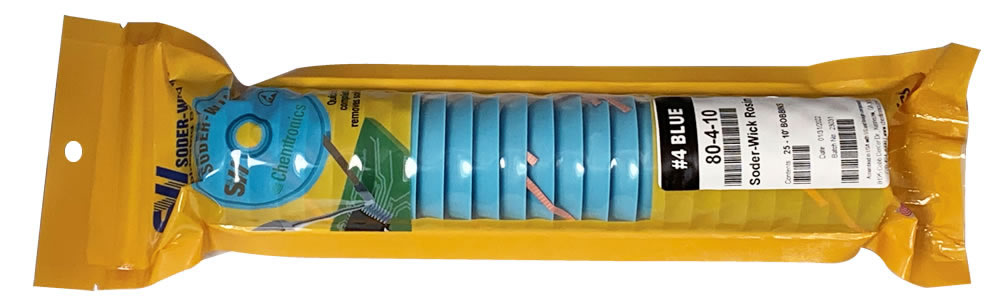
5' and 10' bobbins have 2 packaging options:
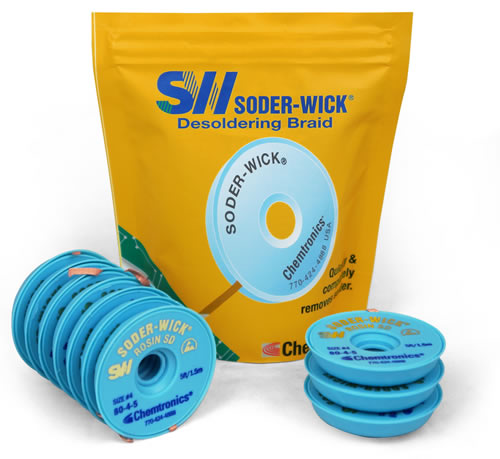
25 bobbins in resealable bag 10 bobbins in resealable pouch

Features & Benefits

  • Engineered specifically for high temperature, lead-free solders
  • Transfers heat to the solder joint more quickly and efficiently than conventional desoldering braids
  • Can also be used with Tin/Lead solders
  • Non-corrosive ultra high purity no-clean flux
  • Will not leave ionic contamination on the boards
  • RoHS Compliant
  • Patent Pending

Specifications:

  • MIL-F-14256 F
  • NASA-STD-8739.3 Soldered Electrical Connections
  • DOD-STD-883E, Method 2022
  • ANSI/IPC J STD-004, Type ROL0

Swipe to View Add to Cart Button 

Soder-Wick Lead-Free - 40-1-5

Wick Size #1 White/Gray

0.03" / 0.8mm wide - best for SMD and micro-circuits
Part # Size Units Per Case Price Per Case Add To Cart
40-1-5

5' / 1.5m L, ESD-safe bobbin

25 bobbins $138.75
Soder-Wick Lead-Free - 40-2-5

Wick Size #2 Yellow

0.06" / 1.5mm wide - best for small pads and SMD
Part # Size Units Per Case Price Per Case Add To Cart
40-2-5

5' / 1.5m L, ESD-safe bobbin

25 bobbins $138.75
40-2-10

10' / 3.0m L, ESD-safe bobbin

25 bobbins $250.00
SW14025

5' / 1.5m L, ESD-safe bobbin
10 bobbins per resealable pouch

6 pouches (60 bobbins total) $329.16
Soder-Wick Lead-Free - 40-3-5

Wick Size #3 Green

0.08" / 2.0mm - best for medium pads
Part # Size Units Per Case Price Per Case Add To Cart
40-3-5

5' / 1.5m L, ESD-safe bobbin

25 bobbins $147.25
40-3-10

10' / 3.0m L, ESD-safe bobbin

25 bobbins $265.25
SW14035

5' / 1.5m L, ESD-safe bobbin
10 bobbins per resealable pouch

6 pouches (60 bobbins total) $343.92
Soder-Wick Lead-Free - 40-4-5

Wick Size #4 Blue

0.110" / 2.8mm - best for large pads
Part # Size Units Per Case Price Per Case Add To Cart
40-4-5

5' / 1.5m L, ESD-safe bobbin

25 bobbins $163.25
40-4-10

10' / 3.0m L, ESD-safe bobbin

25 bobbins $289.50
SW14045

5' / 1.5m L, ESD-safe bobbin
10 bobbins per resealable pouch

6 pouches (60 bobbins total) $385.62

FAQ's

How do I desolder with solder wick / desoldering braid?

Step 1: place the wick over the solder to be removed and then place the hot soldering iron over the braid.

Step 2: Place the tip at an angle that maximizes heat transfer through the braid to the solder. Use a clean tip that you have just tinned with fresh solder to maximize heat transfer. Heat will be moving up the copper, so be careful not to burn yourself.

Step 3: Apply slight pressure and wait for the solder to melt. Don’t get in too big of a hurry at this point. Allow the tip to dwell long enough on the wick to heat the wick and then the solder on the other side. You will see the wick begin to absorb the solder. Hold the tip and wick in place until the wicking action has stopped.

Step 4: Remove the wick and braid at the same time. Removing the iron before removing the wick can cause the wick to become soldered to the board. If that does happen, reheat the braid so that you can remove it.

Check out our video how on how to use desoldering wick.

What is the difference between Soder-Wick No Clean and Soder-Wick Lead-Free, since they both are coated with no-clean flux?

The construction of the braid is the biggest difference. Most wick, including Soder-Wick No Clean, is a flattened tube of braided copper. This works well to pick up as much solder as possible for the given length of the wick. For Solder-Wick Lead-Free, the braid is a ribbon, so a single layer. This allow it to heat up more quickly and reduce the potential of thermal stress of sensitive components at the higher lead-free temperatures.

Can I use solder wick after the expiration date?

Out-of-date solder wick can create a performance issue. As more oxidation builds on the copper braid, it will take longer to activate and draw up solder. It will slow down a little month-to-month until eventually the performance will be unacceptable. We estimate this to be 2-years based on average storage conditions. Wick in storage wrapped up tight can last longer, while a loose bobbin sitting on a benchtop will probably go bad sooner.

An operator will generally have a feel for how wick performs and will have an opinion on when performance is unacceptable. The main risk of using out-of-date wick is thermally stressing the working area, adjacent components, etc. When an operator tries to make due with old wick that is underperforming, they tend to turn up the heat on their iron, or keep the tip in contact with the wick and work for a longer period of time. 

So whether or not out-of-date wick is considered good depends on the criticality and conservativeness of your process. An average shop would keep using it until it stops working well.  A very conservative process (e.g. for class 3 electronics) could require wick in stock to be discarded at the expiration date, and loose bobbins at workstations replaced periodically (i.e. weekly or monthly).

How are Soder-Wick and Chem-Wik desoldering braid products classified?

Chemtronics uses 2 types of flux: Soder-Wick and Chem-Wik lines use natural gum rosin. Per J-STD-004 Section 3.2, they are classified as ROL0. Per British Std. EN 29454-1:1993 and ISO9454-1:1990, they have a classification of 1.1.1.B. No-Clean and Lead-Free fluxes are synthetic (non-colophony)flux. Per J-STD-004 Section 3.2, they are classified as REL0. Per British Std. EN 29454-1:1993 and ISO9454-1:1990, the No-Clean and Lead-Free fluxes have a classification of 1.2.3.B.

How do I figure out the shelf life of a product?

The shelf life of a product can be found on either the technical data sheet (TDS), available on the product page, or by looking on the certificate on conformance (COC). The COC can be downloaded by going to https://www.chemtronics.com/coc. Once you have the shelf life, you will need to add it to the manufacture date for a use-by date. The manufacture date can be identified by the batch number. The batch code used on most of our products are manufacture dates in the Julian Date format. The format is YYDDD, where YY = year, DDD = day. For example, 19200 translates to the 200th day of 2019, or July 19, 2019. This webpage explains and provides charts to help interpret our batch numbers: https://www.chemtronics.com/batch-codes.

What is desoldering wick made of?

Desoldering braid (wick) is made of fine strands of ultra-pure copper woven and coated with flux. Its geometrically precise weave design allows for maximum capillary action and solder capacity. Soder-wick optimizes heat transfer through the braid and into the solder joint, resulting in faster wicking action than any other competitive brand. Minimal flux residue on the board speeds up the cleaning process or eliminates it entirely.

How do you use a desoldering wick?

  1. Place the braid over unwanted solder, preferably on the greatest solder build up so that it maximizes the contact of the braid to the surface area of the solder.
  2. Next, place your iron tip over the wick at 45 degrees and allow heat to transfer to the pad. Molten solder will absorb into the braid.
  3. Move the solder tip and braid as needed to remove all of the solder at one time. Careful not to drag the braid over the pads, which can scratch.
  4. Once the braid is full of solder, you must trim the spent portion and move to fresh braid in order to pull more solder. Remove the iron and braid simultaneously to avoid soldering the wire to the board.

Does solder wick expire?

Yes. As the copper is exposed to the open air, oxygen and moisture in the air interacts and oxidizes the copper. This oxidation is most apparent by the color of the wick. The brighter the copper, the fresher the wick. Oxidized copper will darken like a dirty penny. The more oxidized the copper, the slower the wicking action. We generally recommend replacing wick after 2-years, but that can be longer or shorter depending on storage conditions. Keep the wick bag or can sealed for maximum product life. If you have wick that appears to be too oxidized to use, unroll around 6”, trim off, then test the remaining wick. The outside of the spool of wick becomes oxidized first.

Are you supposed to cut off the solder wick before or after you use it?

The temptation is to desolder an area and keep moving up the spool of braid. However, it’s best to work towards the end of the braid to isolate the heat. Once the desoldering braid is brought up to soldering temperature, the flux has been fully activated, so that part will not draw more solder. A long strand of used braid only acts as a heat sink, slowing down your process.

What is a solder wick?

Desoldering braid or “wick” is a pre-fluxed copper braid that is used to remove solder, which allows components to be replaced and excess solder (e.g. bridging) to be removed. The soldering iron is applied to the wick as it sits on the solder joint, and when both are brought up to the solder's melting point, the flux is activated and, through capillary action from the braided design, solder is drawn up the wick.

Do you need to clean flux?


Yes, flux should be cleaned off of a printed circuit board (PCB) after soldering is completed. The following are the reasons to remove flux residues:

  • Improve Aesthetic Appearance of PCB - If you are a contract manufacturer of PCB’s, the visual appearance of the board reflects on your work. A clear, greasy-looking residue around a solder joint may raise flags for your customer’s incoming QC inspectors. If the flux residue chars and forms spots on the solder joints, it may look like a true defect like a solder joint void or “blow hole”. If the flux residue is from a rework process, it acts as a fault tag in the rework area, calling attention to the work even if there shouldn’t be a concern.
  • Improve Reliability of PCB - Reliability requirements are generally driven by the nature of the final product. For a disposable product like a computer keyboard, nobody loses their life if it stops working. In that case, an EMS supplier may use no-clean flux and forgo the cleaning process. On the other end of the scale, requirements for pacemaker electronics, where board failure could directly lead to death, are going to be much stricter. In that example, cleaning will be required after assembly and any subsequent rework, and the process will be thoroughly tested for effectiveness and repeatability. Long-life durable goods may fall somewhere in-between, with cleaning a requirement, but without the rigid testing and controls.
  • Prevent Corrosion on Components and PCB - Flux residues left on electronic circuit boards are acidic. If they aren’t removed with a cleaning process, the residues can draw in ambient moisture from the air and lead to corrosion of component leads, and PCB contacts.
  • Avoid Adhesion Problems with Conformal Coating - Most people understand that when painting something, the surface must be prepared so it is absolutely clean. Otherwise, the paint will quickly lift off the surface and peel off. The same logic applies to conformal coating, even when the contamination is from no-clean flux. “No-clean” refers to the amount of ionic material left after soldering. It has nothing to do with whether or not coating can stick to it. When there are flux residues left on the PCB before the coating process, it is common to see the coating lift or delaminate from the surface of the board. This is evident when the pockets are isolated around solder joints rather than the overall surface (the exception being the bottom of a wave soldered PCB). To make matters worse, coatings are generally semi-permeable, so breathe to a certain extent. Moisture can enter and soak into the flux residue, and potentially lead to corrosion.
  • Prevent Dendritic Growth from Ionic Contamination - Polar or Ionic particles left from flux residue and other sources, when exposed to moisture from the ambient air and when current is applied, can link into a chain or branch called a dendrite. These dendrites are conductive, so form an unintended trace that cause current leakage or, over a longer period of time, even a short circuit. This is not as much of a concern for no-clean flux. No-clean flux contains minimal ionic material that is fully consumed when the flux is activated, or in other words, brought to soldering temperature. If all of the flux isn’t activated, like when you apply a lot of flux but only solder a small area, you still need to clean the PCB.

Articles

HOW-TO: Remove Solder Bridging from J-Leads & Gull Wing Leads

HOW-TO: Remove Solder Bridging from J-Leads & Gull Wing Leads

Note: This guide is based on the IPC 7711 6.1.2.1 and 6.1.4.1 standards. The graphics and text have been created to provide easy-to-use instructions. This process is used to remove solder bridging between leads on surface mount components. The process is the same for j-leads and gull wings. Solder...
Read This Post
HOW-TO: Remove Excess Solder from SMT Land or BGA with Wick & Blade Tip

HOW-TO: Remove Excess Solder from SMT Land or BGA with Wick & Blade Tip

This guide is based on the IPC 7711 4.4.1 standard. Purchase the full standard from the IPC organization. The graphics and text have been created to provide easy-to-use instructions. This is a process to remove solder from a row of SMT lands using a blade tip. IPC7711 number 4.1.3 describes a proce...
Read This Post
HOW-TO: Desolder & Remove Thru-Hole Component with Solder Wick

HOW-TO: Desolder & Remove Thru-Hole Component with Solder Wick

Note: This guide is based on the IPC 7711 3.1.5 standard. Purchase the full standard from the IPC organization. The graphics and text have been created to provide easy-to-use instructions. This process is used to remove solder holding through-hole components. Desoldering is done from the underside,...
Read This Post
HOW-TO: Remove Excess Solder from SMT Land with Wick

HOW-TO: Remove Excess Solder from SMT Land with Wick

This process is used to prepare a surface mount land for a new component after a component has been removed. Desoldering Braid, also called wick, is used in this process. This guide is based on the IPC 7711 4.1.3 standard and referenced in IPC 7711 5.7.3, 5.7.4, 5.7.5, and 5.7.6. The graphics and ...
Read This Post
Desoldering Wick Application Guide

Desoldering Wick Application Guide

Solder wick, desoldering braid, or just “wick” are all names for a copper braid that is used to absorb solder. It is generally coated with flux, so when heated, solder is melted, drawn up, and retained using a combination of wetting and capillary action. Solder wick allows you to remove solder in is...
Read This Post
Soder-Wick User's Guide

Soder-Wick User's Guide

Wick, Solder Wick, Desoldering Wick, Solder Braid, Desoldering Braid. All of these names refer to the same thing. It is a method of removing unwanted solder using flux and braided copper wire.It is commonly used to aid in removing faulty components, to correct solder bridging, or for any other rea...
Read This Post
Ultimate Guide to Benchtop PCB Rework & Repair

Ultimate Guide to Benchtop PCB Rework & Repair

The reality is that no soldering operation produces perfect assemblies every time. Even the highest quality components fail from time-to-time. That’s why understanding the best rework and repair methods and materials is so important for those who manufacture, maintain, or repair printed circuit boar...
Read This Post
12 Easy Tips to Improve Your PCB Desoldering Today

12 Easy Tips to Improve Your PCB Desoldering Today

The challenge is removing excess solder quickly without damaging the circuit board. That’s why, in this post, we’ll present to you our desoldering best practices, how to use desoldering braid, and top tips that we have encountered during our long history in the electronics industry.
Read This Post
You did not finish submitting your information to request a sample